"Uncork Your Survival: Learn How to Make Wine and Other Spirits for Long-Term Security!"
Introduction
Making wine and other spirits for long-term survival situations is an important skill to have in order to ensure that you have a reliable source of nutrition and hydration. Wine and other spirits can provide essential vitamins and minerals, as well as a source of energy and comfort. In addition, they can be used to barter or trade with other survivors. This guide will provide you with the necessary information to make wine and other spirits for long-term survival situations. It will cover the basics of fermentation, the types of ingredients you can use, and the steps you need to take to make a successful batch of wine or other spirits. With the right knowledge and supplies, you can make sure that you have a reliable source of nutrition and hydration in any long-term survival situation.
How to Choose the Right Grapes for Long-Term Wine Storage
When it comes to long-term wine storage, the type of grape used is an important factor to consider. Different grapes have different characteristics that can affect the taste and quality of the wine over time. Here are some tips to help you choose the right grapes for long-term wine storage.
1. Consider the climate. Different grapes thrive in different climates, so it’s important to choose grapes that are suited to the climate where you’ll be storing your wine. For example, if you’re storing your wine in a cool climate, you’ll want to choose grapes that are known for their ability to withstand cooler temperatures.
2. Look for grapes with thick skins. Grapes with thick skins are better suited for long-term storage because they are less likely to be affected by oxidation.
3. Choose grapes with high acidity. Grapes with high acidity are better for long-term storage because they are less likely to spoil over time.
4. Look for grapes with high sugar content. Grapes with high sugar content are better for long-term storage because they are less likely to ferment over time.
By following these tips, you can ensure that you choose the right grapes for long-term wine storage. With the right grapes, you can enjoy your wine for years to come.
How to Ferment and Age Wine for Long-Term Storage
Wine is a beverage that can be enjoyed immediately after it is made, but it can also be aged and stored for long-term enjoyment. Fermenting and aging wine is a process that requires patience and attention to detail, but the results can be worth the effort. Here are some tips for fermenting and aging wine for long-term storage.
1. Choose the Right Container: The container you choose for fermenting and aging your wine is important. Glass is the best option, as it is non-porous and will not interact with the wine. If you are using a plastic container, make sure it is food-grade and free of any chemicals that could leach into the wine.
2. Monitor Temperature and Humidity: Temperature and humidity are important factors in the fermentation and aging process. The ideal temperature for fermenting and aging wine is between 55 and 65 degrees Fahrenheit. Humidity should be kept between 50 and 70 percent.
3. Monitor the Fermentation Process: The fermentation process is an important part of the aging process. Monitor the fermentation process closely and make sure the wine is not fermenting too quickly or too slowly.
4. Rack the Wine: Racking is the process of transferring the wine from one container to another. This helps to remove sediment and other impurities from the wine. Racking should be done every few months during the aging process.
5. Age the Wine: The aging process can take anywhere from a few months to several years, depending on the type of wine. During this time, the wine will develop its flavor and complexity.
6. Bottle the Wine: Once the wine has reached its desired flavor and complexity, it is ready to be bottled. Make sure to use clean, sterilized bottles and corks.
By following these steps, you can ferment and age wine for long-term storage. With patience and attention to detail, you can enjoy your wine for years to come.
How to Make Hard Cider for Long-Term Storage
Making hard cider for long-term storage is a great way to enjoy a delicious beverage for months or even years. With the right ingredients and equipment, you can make a batch of hard cider that will last for a long time.
First, you will need to gather the necessary ingredients and equipment. You will need fresh apple cider, yeast, a fermentation vessel, an airlock, and a bottling bucket. You will also need bottles, caps, and a capper.
Once you have all of your ingredients and equipment, you can begin the process of making your hard cider. Start by sanitizing all of your equipment. This is an important step to ensure that your cider does not become contaminated.
Next, you will need to add the yeast to the cider. This will start the fermentation process. Once the fermentation is complete, you will need to transfer the cider to the bottling bucket. This will help to remove any sediment that has formed during the fermentation process.
Once the cider is in the bottling bucket, you can add a priming sugar to the cider. This will help to carbonate the cider and give it a bubbly texture. After adding the priming sugar, you can bottle the cider and cap it with the capper.
Finally, you will need to store the cider in a cool, dark place. This will help to ensure that the cider does not spoil. If stored properly, your hard cider should last for several months or even years.
Making hard cider for long-term storage is a great way to enjoy a delicious beverage for months or even years. With the right ingredients and equipment, you can make a batch of hard cider that will last for a long time.
How to Make Moonshine for Long-Term Storage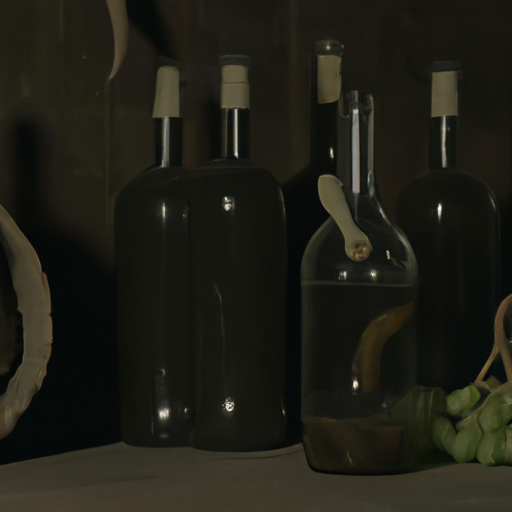
Moonshine is a type of distilled alcoholic beverage that has been produced for centuries. It is often made from corn mash and is known for its high alcohol content. While moonshine is typically consumed shortly after it is made, it can also be stored for long-term use. Here is a guide on how to make moonshine for long-term storage.
First, you will need to gather the necessary supplies. This includes a large pot, a fermentation vessel, a still, a thermometer, a hydrometer, and a collection container. You will also need corn mash, yeast, and water.
Next, you will need to prepare the corn mash. This involves grinding the corn into a fine powder and then adding water and yeast. The mixture should be stirred until it is well blended.
Once the corn mash is ready, it should be transferred to the fermentation vessel. The vessel should be filled with water and the temperature should be kept between 65 and 75 degrees Fahrenheit. The mixture should be stirred daily and the temperature should be monitored.
When the fermentation process is complete, the mash should be transferred to the still. The still should be heated slowly and the temperature should be monitored. When the temperature reaches 170 degrees Fahrenheit, the still should be shut off and the liquid should be collected in the collection container.
Finally, the moonshine should be transferred to bottles or jars for long-term storage. The bottles or jars should be sealed tightly and stored in a cool, dark place. The moonshine should be consumed within one year of being stored.
By following these steps, you can make moonshine for long-term storage. However, it is important to remember that moonshine is a highly alcoholic beverage and should be consumed responsibly.
How to Make Fruit Wines for Long-Term Storage
Fruit wines are a delicious and unique way to enjoy the flavors of the season. They can also be stored for long periods of time, allowing you to enjoy the fruits of your labor for months or even years. Here are some tips for making fruit wines that will last for long-term storage.
First, choose the right fruit. The best fruits for making wine are those that are high in sugar and acidity. These include apples, pears, cherries, and grapes. Avoid fruits that are overly ripe or have been frozen, as these can lead to off-flavors in the finished product.
Second, prepare the fruit. Wash the fruit thoroughly and remove any stems, leaves, or other debris. If you are using grapes, you may want to crush them to release the juice.
Third, add the yeast. Yeast is essential for fermentation, so it is important to choose the right type. Wine yeast is best, as it is specifically designed for making wine.
Fourth, ferment the wine. Place the fruit and yeast in a fermentation vessel and cover it with a lid or airlock. Allow the mixture to ferment for several weeks or months, depending on the type of fruit you are using.
Fifth, rack the wine. Racking is the process of transferring the wine from one container to another, leaving behind the sediment that has settled at the bottom. This helps to clarify the wine and remove any off-flavors.
Sixth, bottle the wine. Once the wine has been racked, it is ready to be bottled. Use clean, sterilized bottles and corks to ensure that the wine will remain fresh for long-term storage.
Finally, store the wine. Store the bottles in a cool, dark place. The ideal temperature for storing wine is between 50 and 55 degrees Fahrenheit.
By following these steps, you can make delicious fruit wines that will last for long-term storage. Enjoy!
How to Make Mead for Long-Term Storage
Mead, an alcoholic beverage made from fermented honey, is a popular drink that has been enjoyed for centuries. While it can be enjoyed fresh, mead can also be stored for long-term use. To ensure that your mead is properly stored for the long-term, there are a few steps you should take.
First, you will need to choose the right type of honey for your mead. The type of honey you use will affect the flavor and quality of your mead, so it is important to select a honey that is of high quality. Additionally, you should make sure that the honey is free of any additives or preservatives.
Next, you will need to prepare the honey for fermentation. This involves heating the honey to a temperature of around 140 degrees Fahrenheit. This will help to kill any bacteria or wild yeast that may be present in the honey. Once the honey has been heated, it should be cooled to room temperature before adding it to the fermentation vessel.
Once the honey has been added to the fermentation vessel, you will need to add yeast. The type of yeast you use will depend on the type of mead you are making. Different yeasts will produce different flavors and aromas, so it is important to select the right yeast for your mead.
Once the yeast has been added, you will need to seal the fermentation vessel. This will help to prevent any oxygen from entering the vessel and spoiling the mead. Additionally, you should make sure that the fermentation vessel is stored in a cool, dark place.
Finally, you will need to bottle your mead. Before bottling, you should make sure that the mead has finished fermenting. This can be determined by taking a hydrometer reading. Once the mead has finished fermenting, you can bottle it and store it in a cool, dark place.
By following these steps, you can ensure that your mead is properly stored for long-term use. With proper storage, your mead can be enjoyed for years to come.
How to Make Fruit Brandy for Long-Term Storage
Fruit brandy is a type of distilled spirit made from fermented fruit juice. It is a popular drink in many countries and can be enjoyed both as a beverage and as an ingredient in cocktails. While it is possible to purchase fruit brandy from a store, making your own at home can be a rewarding experience. With the right equipment and ingredients, you can make a delicious fruit brandy that can be stored for long-term use.
To make your own fruit brandy, you will need a few pieces of equipment. First, you will need a fermentation vessel, such as a carboy or a bucket. You will also need an airlock, a hydrometer, and a distillation apparatus. Additionally, you will need a food-grade container for storing the finished product.
Once you have the necessary equipment, you can begin the process of making your own fruit brandy. Start by selecting the type of fruit you would like to use. Popular choices include apples, pears, peaches, and plums. Once you have chosen your fruit, you will need to prepare it for fermentation. This involves crushing or juicing the fruit and adding sugar and yeast to the mixture.
Once the mixture is ready, it should be transferred to the fermentation vessel and sealed with an airlock. The airlock will allow carbon dioxide to escape while preventing oxygen from entering the vessel. The mixture should be left to ferment for several weeks or months, depending on the type of fruit used.
Once the fermentation process is complete, the mixture should be transferred to a distillation apparatus. This will allow you to separate the alcohol from the other components of the mixture. The alcohol can then be collected and stored in a food-grade container.
Finally, the fruit brandy should be aged for several months or years in order to improve its flavor and aroma. During this time, the brandy should be stored in a cool, dark place. This will help to preserve the flavor and aroma of the brandy for long-term storage.
Making your own fruit brandy at home can be a rewarding experience. With the right equipment and ingredients, you can make a delicious spirit that can be stored for long-term use.
Conclusion
Making wine and other spirits for long-term survival situations is a great way to ensure that you have a reliable source of nutrition and hydration. It is also a great way to add flavor and variety to your meals. With the right ingredients, equipment, and knowledge, you can make a variety of wines and spirits that will last for years. With a little bit of effort and patience, you can make sure that you have a reliable source of nutrition and hydration in any survival situation.

